Plug and Play
Webflow Before & After Image slider by Pixeto
Discover the seamless integration of our custom-built Before & After Image Slider, designed to enhance your Webflow projects effortlessly.
Features:
Attribute Solution
Easy to set up
Optimised for diff. browsers


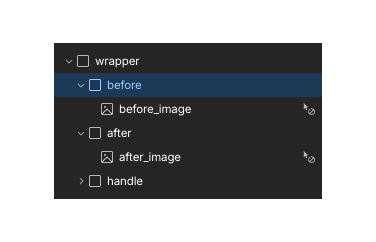
1. Set the Basic HTML Layout
We have a fairly simple HTML structure here: a wrapper with a relative position, 'before' and 'after' divs with absolute positions, and one handle element with an absolute position. The wrapper has defined height and width, and the 'before' and 'after' divs contain their respective images.

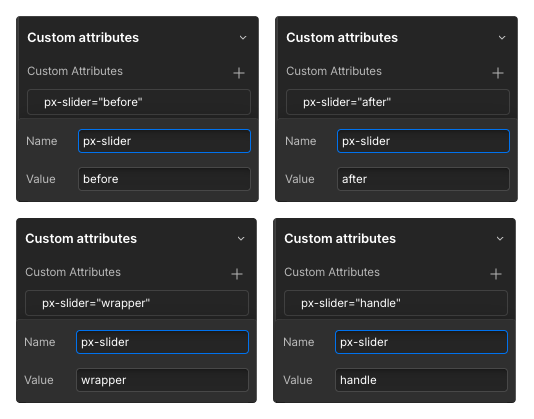
2. Add these attributes to the respective elements:
for the wrapper, use [px-slider="wrapper"]; for 'before', use [px-slider="before"]; for 'after', use [px-slider="after"]; and for the handle,
use [px-slider="handle"]. Adding these attributes is crucial because they bind the code to the elements. If you intend to modify these, ensure you update the code accordingly.


